Project to build a 'Super Smart Alarm Clock' around the latest Raspberry Pi 2 B+ board.
 |
10.1" TFT LED 1024*600
Touch Screen Display |
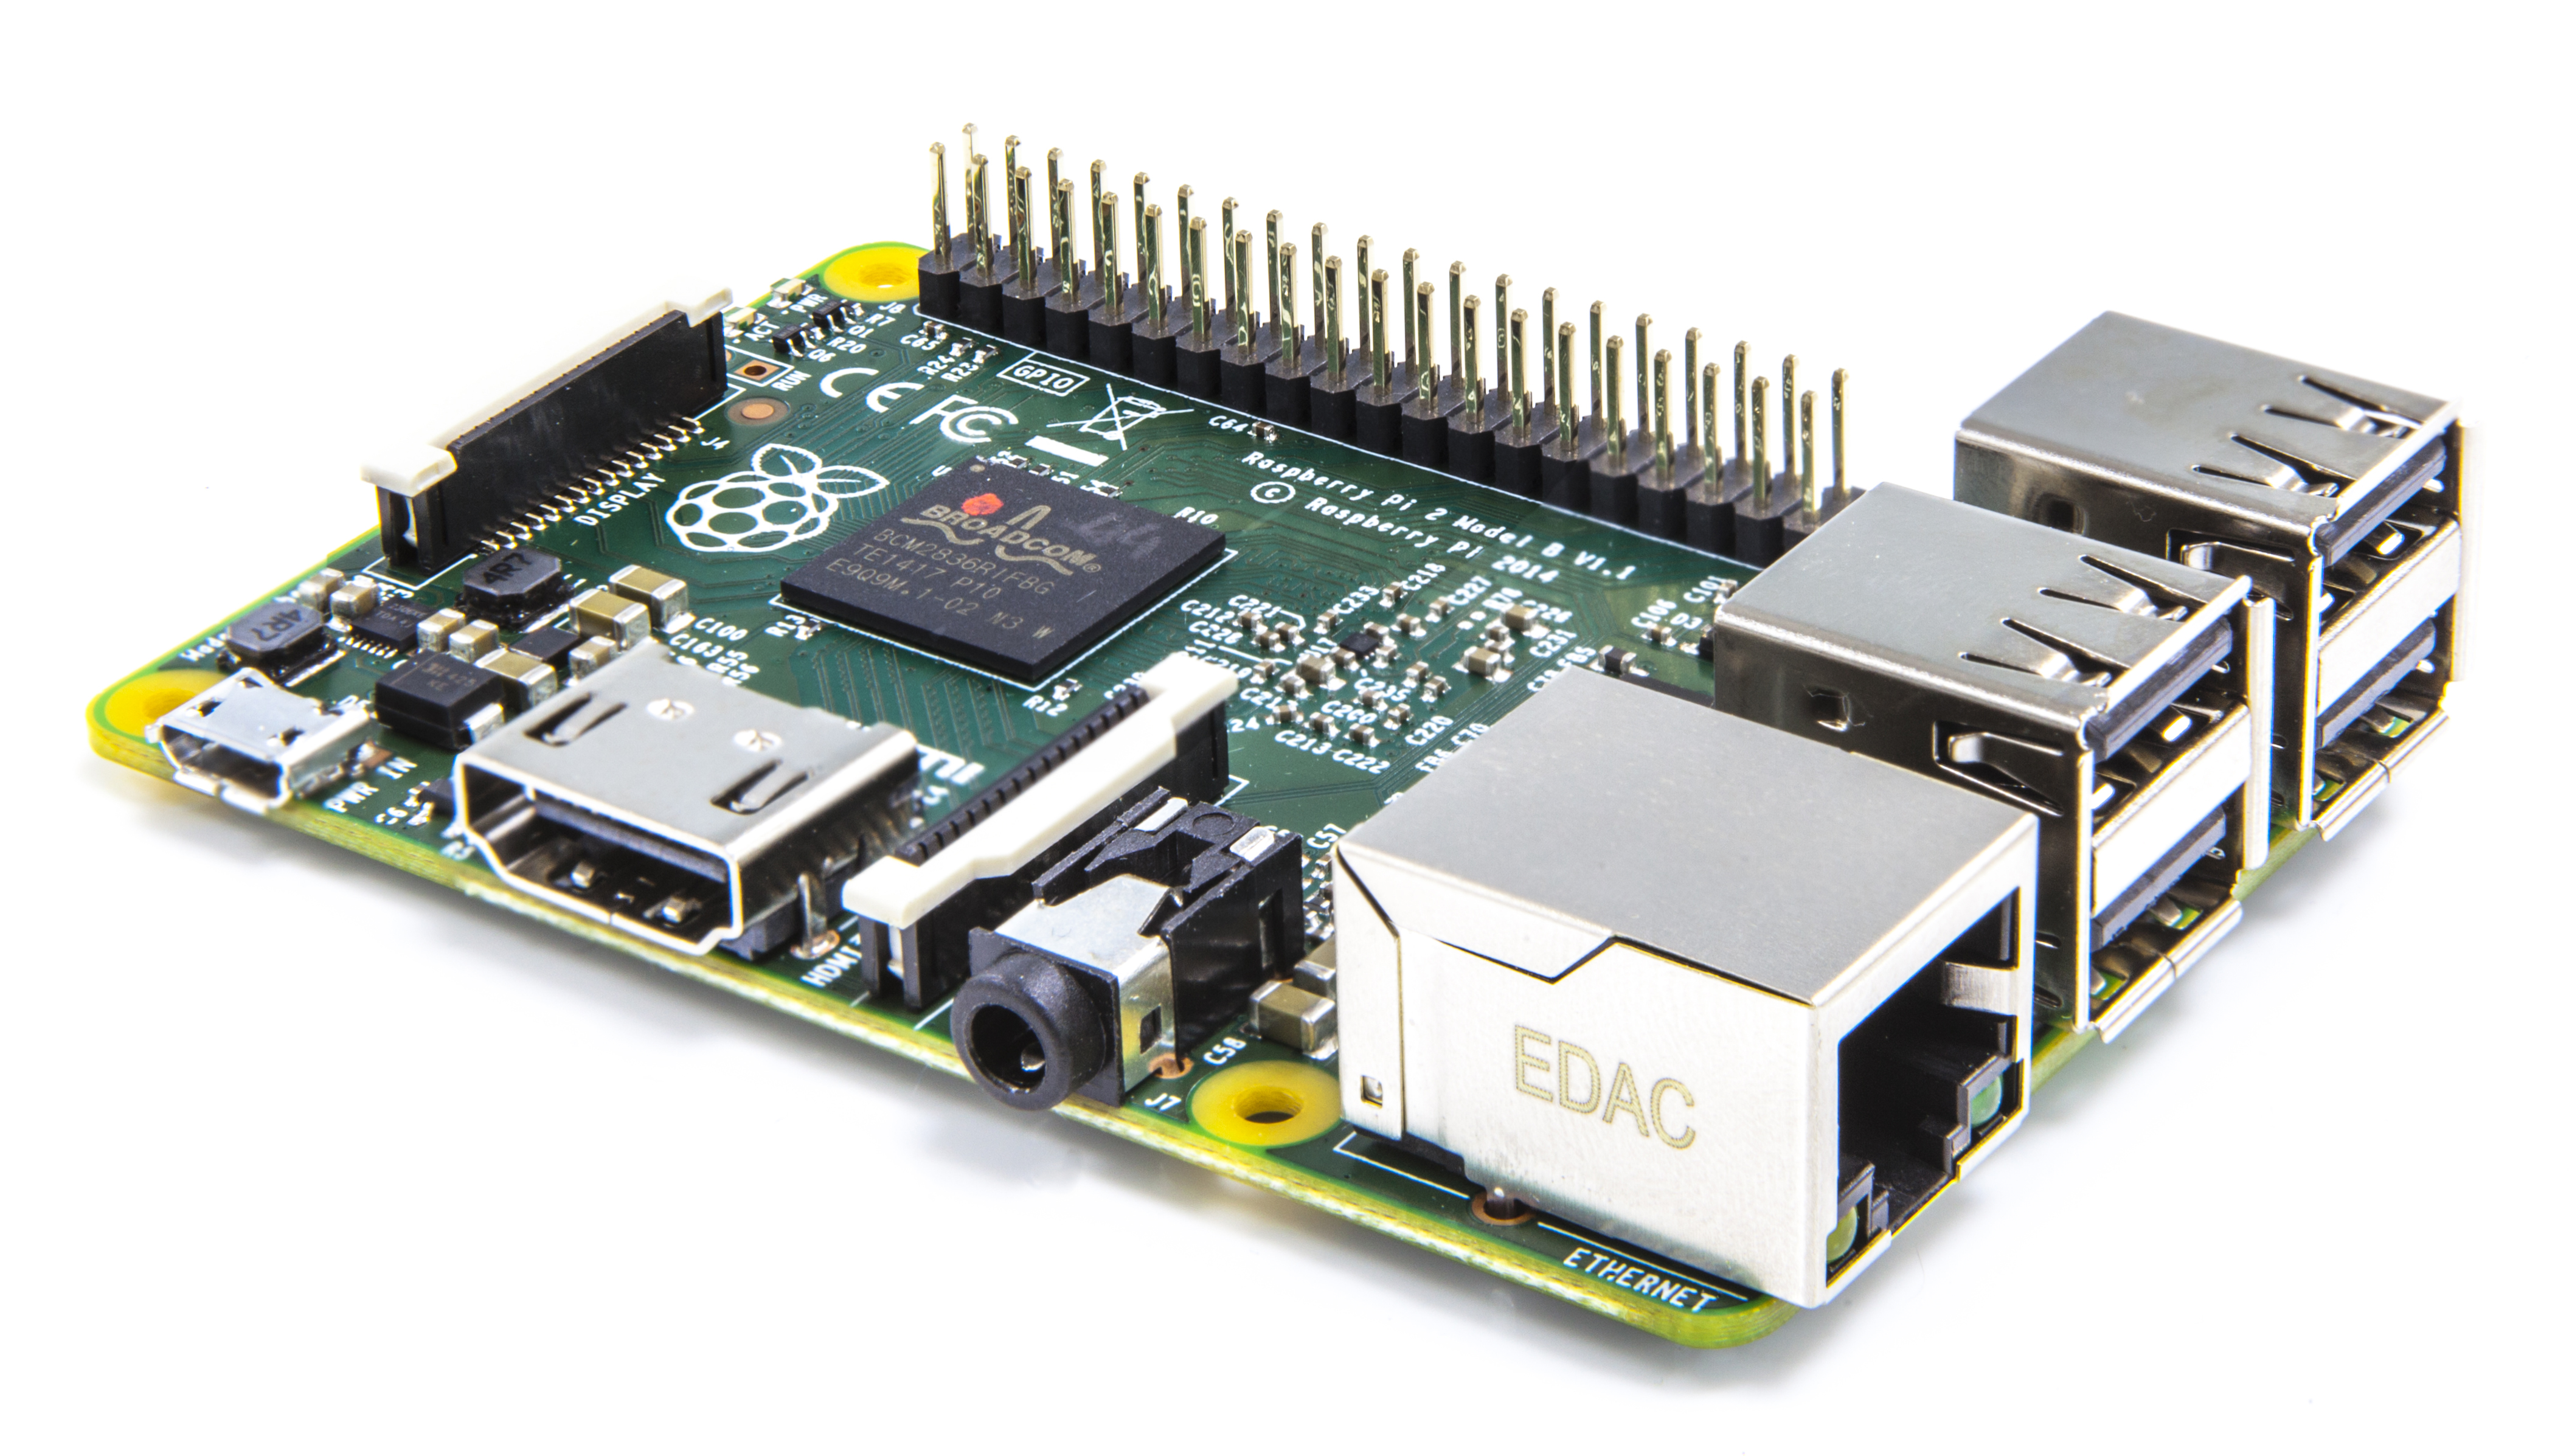 |
RASPBERRY PI 2 - Model B.
1GB RAM, Quad Core CPU |
 |
| Vivanco wireless active bookshelf speakers |
Who am I?
I am a 59 year old designer/technical illustrator from Cheshire, currently working as as a web designer for a web startup company in Torquay.
When it comes to projects like this, I'm more of a designer than a programmer, but with a little help from my friend Google (and of course, an army of other online makers, programmers and bloggers), I can usually get things to work.
This is a real project of the 'internet of things' and a good example of 'convergence'. It could be argued that it isn't really an alarm clock but a tablet computer, media centre or whatever else, but it will live by my bedside to awaken me with any sound, vision or information that I choose. I couldn't find room on my bedside table for my desktop computer, keyboard and mouse (although at one time I did set my Mac to wake me up with a CD when it was in the same room as I slept). My smartphone's screen is also a bit too small to read the mornings news, emails and facebook posts. I can play music from my iPhone or iPod, but fiddling with cables and chargers isn't fun or tidy, for that matter.
History
I was one of the first to get my hands on a Raspberry Pi, this will be my third. My last project was to build a smart tv which ran full screen Youtube videos and played all my networked media as well as my favourite internet radio station Radio Paradise, (an eclectic commercial free Internet radio station in California http://www.radioparadise.com/). I had also messed around with a few Arduino boards, and more specifically, many years ago I built an LED digital clock out Maplin parts and a home-made perspex case, so that I could admire my dreadful soldering as well as see the time in the middle of the night.
Origins
This project has been inspired by Tony Dicola's SMART Alarm clock on Makezine.
http://makezine.com/projects/s-m-a-r-t-alarm-clock/
I like that, but the screen would be too small for my blurry-eyed first-thing-in-the morning-before-I-can-find-my-glasses, vision. He based his project on the Arduino Yun which carries a second processor running an embedded version of Linux. He cleverly uses Google Calender to set the alarm remotely.
Matt Dyson's 'Alarmpi' http://mattdyson.org/projects/alarmpi/ is also along similar lines being a Raspberry Pi based smart alarm, but just features an LCD clock with a small text display, although it has an impressive set of functions, not least the openweathermap feed, internet radio and Google calendar integration. It also has home automation functions.
Adafruit's open clock project, an LED clock in a 3D printed case is a great design too, but just uses an LED display.
https://blog.adafruit.com/2013/03/21/open-clock-project-fully-functional-working-prototype-3dthursday/
I also love Instructables (http://www.instructables.com) and plan to post this completed project on there when it's done. There's dozens of funky home built alarm clocks on there.
I found this useful. How to tweet from an Arduino using the wifi sheild by echoalex http://www.instructables.com/id/How-to-tweet-from-an-Arduino-using-the-wifi-sheild/?ALLSTEPS
I originally planned just to have a smart alarm with the local weather, so this Instructable project was my first inspiration. Raspberry Pi Internet Weather Station http://www.instructables.com/id/Raspberry-Pi-Internet-Weather-Station/?ALLSTEPS
Project
I have been involved with the internet since its inception and love computers and electronics and technology in general, but I am a very practical sort of person, so I wanted to do something that would be really useful and enhance my life. The bedside alarm is, of course one of the most useful items that we need in our daily lives and I have had a succession of these ranging from compact travel alarms to clock radios, clock tape recorders and even a teasmaid, which on no account would pass any health and safety checks in the modern day, being awoken with hot steam issuing a few centimetres away from ones ear. I now have a useful projection clock so that I can see the time clearly displayed on the ceiling if I wake up in the night. It is also radio controlled by an accurate time signal which is right most of the time, but for some inexplicable reason goes out by exactly 4 or 6 hours occasionally (I personally think it must have an ironic sense of humour).
Why 'Super Smart Alarm Clock'?
I'm glad you asked that, since I don't have the right to name something with such an impressive and dangerously presumptuous title without backing it up sufficiently. Well, it would be easier to say what it can't do, partially due to the expansion possibilities of the amazing raspberry pi and range of internet web services, but I'll have a go.
What is planned
Remotely set alarm clock, iPhone dock, music centre with remote speakers, Kodi network media player, streaming music and YouTube/Vimeo feeds, Google calendar with notifications, internet radio, streaming digital photo frame, Gmail server, Twitter feeder, Facebook viewer, news reader, RSS reader, weather reporter...
plus, using the RPI's GPIO header
240v extension socket remote switch/timer to turn on any household appliance, such as lights, fans, heaters etc and future possibilities include home security with CCTV/remote surveillance through a web browser.
Functionality
I like Google cloud services and I have been using Google Calendar as well as Google Docs, sites and also Gmail for some time now. One of the things I have particularly found useful is the Gmail/Calendar notifications which flag up on my iPhone, reminding me of important events and meetings. Of course, Google cloud services can be accessed from any computer, smartphone or tablet, wherever you happen to be.
This project will make use of API's from Google as well as from Twitter, Tumblr (for the photo frame), Wunderground, the weather underground site (http://www.wunderground.com/) and National Lottery Results from http://lotteryresults.bentasker.co.uk/.
So what is an API?
An API ('Application Programming Interface' http://en.wikipedia.org/wiki/Application_programming_interface) is a set of tools to help when transferring secure, live data from the internet.
Design and Build
I will use Sketchup (http://www.sketchup.com/) to design the case and make the files available should you want to use them. I plan to use Plywood as it is easy to fashion and looks good, as well as matching the wooden surrounds of the remote speakers, although a 3D printed case is possible directly from the sketchup files. I don't want to do that just yet, until I have a fully working prototype that may have many mods before it is an optimum design. For example, I was wondering if a cooling fan might be necessary, and a 'carrying' slot, so that it could be easily moved with one hand. The slot would be a good air vent for cooling too. I will incorporate small speakers although the plan is to use remote active bookshelf speakers, as they have much more power and therefore volume, but I may not want to fill the entire room with sound at the crack of dawn.
The heart of the project is the new Raspberry Pi 2 Model B+. It is 6 times faster than the previous model, with 1Gig of RAM and a Quad Core CPU. I found the earlier model a bit sluggish when choosing media files in XBMC (now Kodi) also it has an extended GPIO header for better expansion capabilities, more usb outlets with 1.2Amp power so no need to resort to a powered hub, plus ports for camera (for home security) and touch screen monitor, as I don't want to fiddle with a keyboard on a day to day basis, unless programming or adjusting settings. It also has a 4-pole jack for stereo audio out and composite video via HDMI at a very respectable 1080P resolution.
The Project so far
Well, I have done a lot of research, scribbling on graph paper and set up accounts and API's with Google, Twitter, Tumblr, wunderground and Temboo (for help with coding the API's https://temboo.com/) as per the instructions on Tony Dicola's Makezine post (http://makezine.com/projects/s-m-a-r-t-alarm-clock/).
The next step is to download the latest Raspbian Wheezy OS
I have an SD slot on my laptop, but I found that as it is not USB 2.0 it won't read my 16Gig card. I had to get this external card reader which supports USB 2.0.
USB 2.0 External card reader.
The first plan is to test all the new API's. I'll let you know...


 That all went extremely smoothly and after logging in with the username ‘pi’ and password ‘raspberry', simply typing 'Startx' produced the start screen.

 The mini WiFi Dongle
As this is my third RPI, I didn’t find it too difficult to set up the wifi, using a mini usb dongle, but I’ll include a link to a guide here:
The mini WiFi Dongle
As this is my third RPI, I didn’t find it too difficult to set up the wifi, using a mini usb dongle, but I’ll include a link to a guide here:


